Main Courses
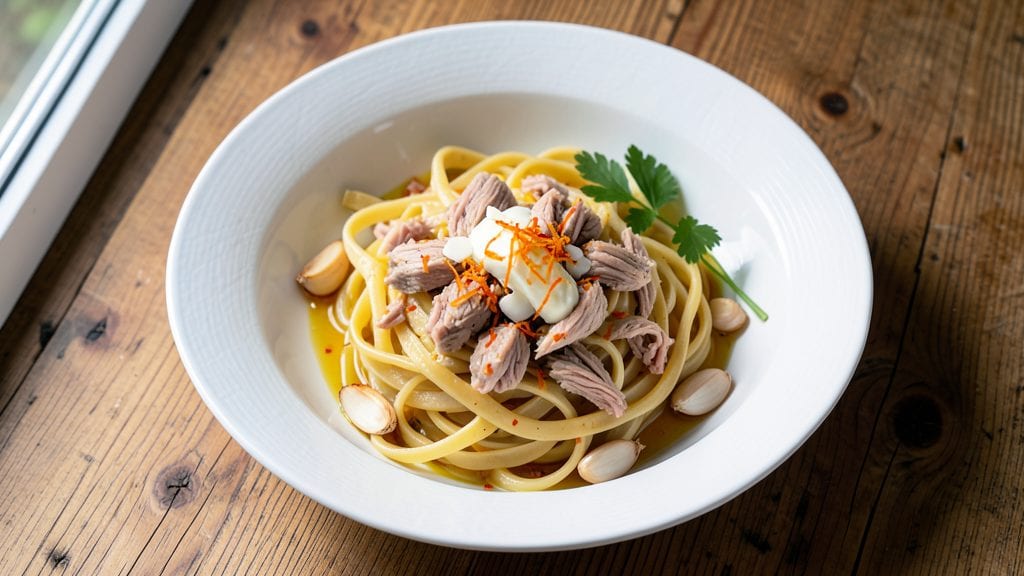
Transforming simple canned tuna into a restaurant-worthy one-pan lemon garlic pasta is easier than you think. This recipe turns pantry staples into a bright, garlicky dish with crispy breadcrumb topping that adds texture without extra effort.
After years of testing quick weeknight meals, I’ve perfected this method to deliver maximum flavor with minimal cleanup.
The secret lies in balancing acidity and richness: lemon brightens the tuna while garlic and butter create depth. A crispy breadcrumb topping adds a satisfying crunch that contrasts perfectly with the tender pasta and flaky fish.
The entire meal comes together in one pan in under 30 minutes, making it ideal for busy weeknights when you still want something special.
What you’ll end up with is a dish that’s vibrant, aromatic, and packed with layers of flavor—golden pasta strands, tender tuna, and a topping that’s crispy enough to stand up to the sauce.
The lemon-garlic aroma alone will have everyone at the table asking what’s for dinner. This is the kind of meal that proves pantry staples can be just as impressive as fresh ingredients.
Serve with a simple side salad or crusty bread to soak up every last bit of that bright, garlicky sauce. The recipe scales easily for larger groups, and leftovers reheat beautifully. Let’s get cooking—this one-pan wonder is about to become your new go-to dinner.
Ingredients for tuna canned
Pantry staples that pack restaurant-worthy flavor in one pan.
| Ingredient | Amount | Notes |
|---|---|---|
| Canned Tuna in Olive Oil 🐟 | 2 cans | Drained, high-quality preferred |
| Lemon Zest 🍋 | 1 tbsp | From 1 large lemon |
| Lemon Juice 🍋 | 0.3 cup | Freshly squeezed, about 1 lemon |
| Garlic Cloves 🧄 | 4 cloves | Minced, fresh preferred |
| Unsalted Butter 🧈 | ½ cup | Cold, cut into cubes |
| Pasta 🍝 | 12 oz | Spaghetti or linguine |
| Parmesan Cheese 🧀 | ½ cup | Freshly grated, block preferred |
| Breadcrumbs 🍞 | ½ cup | Panko for extra crunch |
| Fresh Parsley 🌿 | ¼ cup | Chopped, for garnish |
| Olive Oil 🫒 | 2 tbsp | For crisping breadcrumbs |
| Salt 🧂 | 1 ½ tsp | Kosher or sea salt |
| Black Pepper 🌶️ | ½ tsp | Freshly ground preferred |
| Red Pepper Flakes 🌶️ | ¼ tsp | Optional, for heat |
The tuna makes all the difference—high-quality brands like Wild Planet or Raincoast have richer flavor than the generic stuff. Drain it well, but save that oil for another use (it’s packed with flavor). The lemon? Use Meyer lemons if you can—they’re sweeter and add a floral note. Fresh garlic is non-negotiable here; pre-minced gets mushy. For the butter, Plugrá or Land O’Lakes unsalted work perfectly. If you’re in a pinch, European-style butter has more flavor than American brands. The pasta? Barilla or De Cecco cook up perfectly every time—I avoid the cheap stuff that turns mushy.
No fresh parsley? Dried works at one-third the amount, but it won’t look as pretty. Short on breadcrumbs? Crushed cornflakes or cracker crumbs add crunch too. The olive oil for crisping? Any neutral oil works, but extra-virgin adds a nice fruity note. If you’re avoiding gluten, use gluten-free breadcrumbs—just toast them extra long to get that crisp. The red pepper flakes are optional, but Trader Joe’s or Penzeys carry the best quality. Want more zing? Add a splash of white wine to the sauce—whatever’s open in the fridge works.
This reheats beautifully—just add a splash of water or pasta water to loosen the sauce. Keeps for 3 days in the fridge, and freezes for 2 months if you portion it right. I double the topping recipe and store it separately—just sprinkle on fresh when reheating. The lemon juice can make the sauce separate, so stir it well before serving. Leftovers taste even better the next day as the flavors meld.
Why You'll Love This Recipe
- This works anywhere: tossed with pasta, spread on toast, or piled onto crackers for a fancy-ish snack. I’ve served it at picnics, packed it for work, and even used it to jazz up a sad salad. It’s the ultimate “I don’t know what I’m doing but it’ll work” dish.
- Pantry-to-Table Magic: I swear by this one—no shopping lists, no last-minute ingredient hunts. Just open a can (that olive oil? Chef’s kiss), squeeze some lemon, and you’re golden. The only prep is mincing garlic, which takes longer to describe than to do.
- Bright & Buttery Rich: That olive oil from the can? It’s the secret—creamy, rich, and way better than water-packed tuna. Add a hit of lemon zest and garlic, melt in butter, and you’ve got a flavor punch that’s fresh, bold, and somehow comforting. (Yes, even on a Tuesday night.)
- Lunchbox or Dinner Plate: This works anywhere: tossed with pasta, spread on toast, or piled onto crackers for a fancy-ish snack. I’ve served it at picnics, packed it for work, and even used it to jazz up a sad salad. It’s the ultimate “I don’t know what I’m doing but it’ll work” dish.
Step-by-step instructions for one-pan lemon garlic pasta with crunchy topping
Here's how to make this bright, flavorful pasta with crispy breadcrumb topping in one pan.
Cook the Pasta and Prepare the Sauce Base
Bring a large pot of water to a rolling boil and add the 12 oz pasta along with 1.5 tsp salt. Cook until al dente according to package instructions, but reserve 1 cup of pasta water before draining. This starchy water is key for creating a silky sauce later.
While the pasta cooks, heat 2 tbsp olive oil in a large skillet over medium heat. Add the 4 cloves minced garlic and sauté for 30 seconds until fragrant but not browned. Immediately add the drained tuna from 2 cans and stir through. Pour in the 0.3 cup lemon juice and 1 tbsp lemon zest, mixing well to combine all the flavors. Keep this mixture warm on low heat.
Create the Crispy Breadcrumb Topping
In a small bowl, combine the 0.5 cup breadcrumbs, 0.5 cup grated parmesan cheese, 0.5 tsp black pepper, and 0.25 tsp red pepper flakes. Cut the 0.5 cup cold butter into small cubes and mix them into the breadcrumb mixture until evenly distributed. The cold butter will create pockets of flavor as it melts.
Spread this mixture evenly over the tuna and sauce in the skillet. Place the skillet under a preheated broiler for 3-4 minutes until the topping turns golden brown and crispy. Watch closely to prevent burning - you're looking for even color throughout. This crispy layer adds texture contrast to the creamy pasta.
Combine Everything and Finish the Sauce
Remove the skillet from the broiler and add the cooked pasta directly into the pan. Toss everything together vigorously for 1-2 minutes, using some of the reserved pasta water if needed to loosen the sauce to your desired consistency. The pasta will absorb some of the liquid, so add water gradually until you achieve a creamy, clingy sauce.
Stir in the 0.25 cup chopped fresh parsley and taste for seasoning. You might need a little more salt or lemon juice to balance the flavors. The dish should be bright from the lemon, savory from the tuna, and have a satisfying crunch from the topping. Let it sit for 1 minute off the heat to allow all the flavors to meld together.
Serve Immediately for Maximum Freshness
Divide the pasta among four plates, making sure each serving gets an even distribution of the crispy topping. The breadcrumbs should be golden and crunchy on top, with the creamy lemon garlic sauce clinging to every strand of pasta. Garnish with additional parsley if desired.
This dish is best served immediately while the breadcrumb topping is still crispy. The bright lemon flavor cuts through the richness of the tuna and butter, while the crunchy topping adds an exciting textural element. Pair with a simple green salad or crusty bread to soak up any extra sauce.
Pro Tips For Making Tuna Canned
- Drain the Tuna Dry: That olive oil in the can is flavor gold, but it’ll turn your dish into a soggy mess if you don’t handle it right. Drain the tuna thoroughly over a bowl, then blot it with a paper towel—yes, even if it looks dry. The last thing you want is a buttery, watery sauce instead of a bright, balanced flavor.
- Use Whole Garlic, Not Paste: I know minced garlic is convenient, but whole cloves toasted in butter until just golden make a real difference. Smash them with the flat of your knife after topping—this releases their flavor without burning. Skimp here, and your dish tastes like it’s missing something.
- Zest Before Juicing: Lemon zest packs way more punch than juice, so grab a microplane and work in one direction—no zigzagging, or you’ll end up with bitter pith. Do this right before adding the zest to the pan, so it doesn’t turn dull sitting around. Freshness matters here.
- Finish with Butter, Not Salt: Toss in the butter off-heat for the last 30 seconds—it’ll melt instantly and coat everything evenly. If you salt it first, you’ll end up with a bland, buttery sludge instead of a bright, cohesive dish. Trust me, the butter’s the glue that holds the flavors together.
Serving suggestions for tuna canned
Classic Tuna Salad
Transform your leftover lemon garlic pasta into a satisfying tuna salad by breaking it into bite-sized pieces and mixing with 1 tbsp mayonnaise, 1 tsp Dijon mustard, and 1 tbsp chopped celery.
The bright lemon flavor from the pasta keeps it fresh, while the crispy breadcrumb bits add texture. Serve on toasted sourdough slices or crackers for a quick lunch. 🥪
Crispy Tuna Pasta Salad
For a cold meal, toss the cooled pasta with 2 tbsp olive oil, 1 tbsp red wine vinegar, and 1 tsp dried oregano. Top with extra crispy breadcrumbs (toasted separately in a dry pan for 2 minutes) and chopped parsley.
This works perfectly for picnics or potlucks, especially when packed in glass mason jars with dressing on the bottom. 🧺
Garnish Like a Pro
Fresh garnishes elevate this dish instantly. A sprinkle of toasted pine nuts (toasted in a dry pan for 1-2 minutes) adds crunch, while thin lemon slices on the side keep the flavor bright.
For a restaurant touch, drizzle with extra-virgin olive oil and a pinch of flaky sea salt right before serving. 💫
Bread Pairings
Serve with crusty ciabatta or focaccia to soak up the lemony sauce. For a heartier option, try garlic bread made with the same butter and garlic used in the recipe—it’s a match made in heaven. The crispy breadcrumb topping pairs perfectly with the buttery, garlicky bread. 🍞
Side Salad Balance
A simple arugula salad with lemon vinaigrette (mix 2 tbsp olive oil, 1 tbsp lemon juice, and ½ tsp honey) cuts through the richness of the pasta. Add cherry tomatoes and shaved parmesan for extra brightness. The peppery arugula contrasts beautifully with the creamy tuna sauce. 🥗
Leftovers Reinvented
Turn leftovers into a tuna-stuffed avocado by halving avocados and filling them with the pasta mixture. Top with a sprinkle of crushed red pepper flakes and chopped cilantro for a fresh twist.
Or, mix with mashed potatoes for a creamy, cheesy casserole—just add ½ cup shredded cheddar and bake at 375°F for 15 minutes. 💡
Nutrition facts
Frequently asked questions
Can I use water-packed tuna instead of olive oil-packed?
The recipe works with water-packed tuna, but the flavor will be less rich. To compensate, add 1 extra tablespoon of olive oil when sautéing the garlic and tuna, and consider adding ½ teaspoon of lemon zest to enhance brightness. Drain the tuna thoroughly to avoid a watery sauce.
How do I adjust this for gluten-free diets?
Use gluten-free breadcrumbs and ensure your pasta is certified gluten-free. Toast the breadcrumbs in a dry pan for 3-4 minutes longer to achieve crispiness. The butter and cheese should already be gluten-free, but always check labels. The rest of the recipe remains the same.
Why did my topping turn out soggy instead of crispy?
Soggy topping usually means the butter melted too quickly or the breadcrumbs weren't toasted enough. Next time, spread the topping in a thin, even layer and broil for 2-3 minutes at a time, checking frequently. For extra insurance, chill the skillet for 5 minutes in the fridge before broiling to firm up the butter.
Can I make this ahead of time?
Yes! Assemble the dish without the crispy topping and refrigerate for up to 2 days. When ready to serve, simply broil the topping fresh for 3-4 minutes to restore crispiness. Store the breadcrumb mixture separately and toast it in a dry pan for 2 minutes before adding to reheated pasta.
What's the best way to reheat leftovers?
Gently reheat in a skillet over medium-low heat with a splash of water or pasta water to prevent drying. For the topping, toast fresh breadcrumbs in a separate pan and sprinkle on top after reheating. Never microwave with the topping on—it'll turn rubbery. The sauce may thicken when cold, so add a little liquid when reheating.